
Natural Wart Remover You Already Have at Home
You’ve likely got several natural wart removers right in your home! Apple cider vinegar can help dissolve warts when applied daily. Garlic, with its antiviral properties, can be mashed into a paste or used as a slice on the wart. Tea tree oil works wonders too; just apply it directly or mix it with a carrier oil. Don’t forget about banana peels or aloe vera for soothing effects. Keep exploring these remedies to find out which works best for you!
Key Takeaways
- Apple Cider Vinegar: Soak a cotton ball in ACV and apply it to the wart overnight for effective tissue breakdown.
- Garlic: Use garlic paste or slices on the wart; its antiviral properties help combat warts while boosting immunity when consumed.
- Duct Tape: Cover the wart with duct tape for six days to suffocate it and stimulate an immune response for removal.
- Banana Peel: Secure a piece of banana peel, white side down, on the wart overnight to utilize its natural enzymes for breakdown.
- Tea Tree Oil: Apply tea tree oil directly onto the wart; its antimicrobial properties can lead to significant improvements over time.
Apple Cider Vinegar
When it comes to natural wart removal, apple cider vinegar (ACV) stands out as one of the most popular remedies. This household staple boasts potent properties that can help eliminate warts effectively.
To use ACV as a natural wart remover, soak a cotton ball in the vinegar and apply it directly to the wart. Secure it with a bandage overnight. You’ll want to repeat this process daily for a couple of weeks.
The acidity in ACV helps break down the wart tissue, promoting shedding. While it may cause some stinging initially, most users find the results worth it. Additionally, incorporating daily apple cider vinegar into your routine can enhance overall gut health, further supporting your body’s natural healing processes.
Remember to keep the area clean and moisturized to speed up healing. With patience and persistence, you can see noticeable improvements!
Garlic
Garlic isn’t just a flavorful addition to your meals; it also boasts antiviral properties that can help fight warts.
You can easily apply garlic in various ways to target those pesky growths effectively.
However, it’s important to take into account some precautions to guarantee safe and effective use.
Antiviral Properties of Garlic
Although many people know garlic for its culinary uses, its antiviral properties make it a powerful ally in natural health remedies. Rich in compounds like allicin, garlic can help combat various viral infections.
When you consume garlic, it boosts your immune system, enhancing your body’s ability to fight off viruses effectively. This can be particularly beneficial for those susceptible to common illnesses, such as colds and flu.
Additionally, garlic’s antifungal and antibacterial properties further support its reputation as a natural healer. By incorporating garlic into your diet, you’re not just adding flavor; you’re also giving your immune system a significant boost.
Application Methods Explained
To effectively harness garlic’s antiviral and antifungal benefits, you’ll want to explore various application methods. Here are four effective ways to use garlic for wart removal:
-
Garlic Paste: Crush a clove of garlic into a paste and apply it directly to the wart. Cover it with a bandage and leave overnight for maximum effect.
-
Garlic Oil: Infuse olive oil with crushed garlic, let it sit for a few days, then apply the oil to the wart using a cotton ball.
-
Raw Garlic Slice: Place a thin slice of raw garlic directly on the wart, secure it with a bandage, and leave it on for a few hours.
-
Garlic Soak: Soak the wart in warm water with crushed garlic for about 20 minutes to boost healing.
Experiment with these methods to find what works best for you!
Precautions and Considerations
While garlic is a powerful natural remedy for warts, it’s essential to take certain precautions to guarantee safety and effectiveness.
First, always perform a patch test before applying garlic to your skin. You don’t want to risk an allergic reaction or irritation. If you have sensitive skin, consider diluting the garlic with a carrier oil to minimize potential discomfort.
Avoid using garlic on open wounds or broken skin, as this can lead to further irritation. Additionally, be patient; natural remedies take time to work, so don’t expect immediate results.
Finally, if you notice any adverse effects or if your wart worsens, consult a healthcare professional. Your skin health is important, so take these precautions seriously!
Baking Soda
If you’re looking for an effective and affordable way to tackle warts at home, baking soda might be just what you need. This common household item not only helps in baking but can also assist in wart removal.
Here’s how to use it:
-
Make a Paste: Mix baking soda with water to create a thick paste.
-
Apply: Dab the paste directly onto the wart, covering it completely.
-
Cover: Use a bandage to hold the paste in place, allowing it to work overnight.
-
Repeat: Do this daily until the wart begins to diminish.
Baking soda helps exfoliate the wart while promoting skin healing.
It’s a simple, natural solution you can start using today!
Tea Tree Oil
Tea tree oil’s antimicrobial properties make it a powerful natural option for treating warts. You can easily apply it using a cotton swab or mix it with a carrier oil for added benefits. Additionally, research has shown that tea tree oil’s antimicrobial properties can effectively target the virus responsible for warts. Let’s explore how to effectively incorporate tea tree oil into your wart removal routine.
Antimicrobial Properties Explained
When it comes to natural wart removal, understanding the antimicrobial properties of tea tree oil can make a significant difference in your treatment approach.
This essential oil is known for its ability to fight bacteria, fungi, and viruses, which is vital when dealing with warts. Here’s what you should know about its antimicrobial benefits:
-
Antibacterial: It helps eliminate harmful bacteria that can cause infections around warts.
-
Antifungal: Tea tree oil combats fungal infections, preventing warts from worsening.
-
Antiviral: Its antiviral properties target the virus responsible for warts, aiding in their removal.
-
Skin-soothing: It reduces inflammation and irritation, promoting healthier skin as warts diminish.
Incorporating tea tree oil into your regimen can enhance your wart-removal efforts effectively.
Application Methods Suggested
There are several effective ways to apply tea tree oil for wart removal, making it a versatile option in your home treatment arsenal.
Start by cleaning the affected area thoroughly, then soak a cotton ball in tea tree oil. Apply it directly to the wart and secure it with a bandage. Leave it on for several hours or overnight for best results. You can repeat this method daily until the wart disappears.
Alternatively, you can mix a few drops of tea tree oil with a carrier oil like coconut oil to reduce irritation before applying. Always patch test first to verify your skin reacts well.
With consistent application, you’ll likely see improvements in no time!
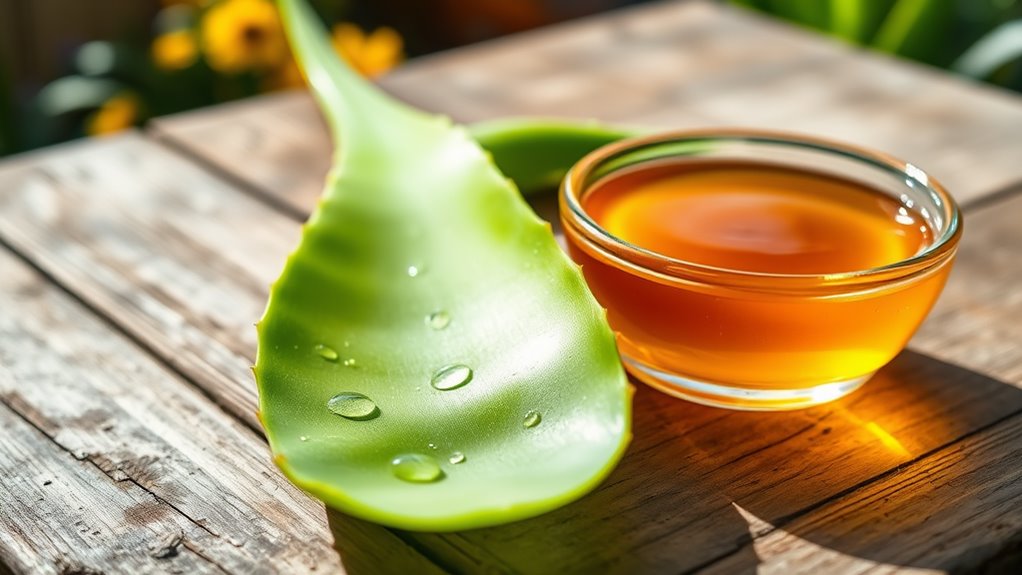
Aloe Vera
[Aloe vera is a powerhouse of natural healing, making it an excellent choice for wart removal at home. This succulent plant is known for its soothing properties and can effectively help in reducing warts. Additionally, its natural antibacterial properties can aid in preventing any possible infections during the wart removal process. Furthermore, its moisturizing effects can promote overall skin health, enhancing the healing process.
Here’s how you can use it:
- Harvest the Gel: Cut an aloe vera leaf and scoop out the fresh gel.
- Apply Directly: Rub the gel on the wart, covering it thoroughly.
- Leave It On: Let the gel sit for about 30 minutes before rinsing it off.
- Repeat Daily: For best results, apply the gel once or twice a day until the wart diminishes.
With its natural antibacterial properties, aloe vera not only helps in wart removal but also promotes skin healing.
Give it a try!
Duct Tape
Duct tape might not be the first thing that comes to mind for wart removal, but it’s surprisingly effective. This common household item can help suffocate the wart and stimulate your immune response to fight it off. Simply cut a piece of duct tape, place it over the wart, and leave it for about six days. After that, remove the tape, soak the wart in water, and gently rub it with a pumice stone. Repeat as needed until the wart disappears.
Here’s a quick overview of the process:
| Step | Action | Duration |
|---|---|---|
| Apply duct tape | Cover the wart | 6 days |
| Soak in water | Soften the wart | 10-15 minutes |
| Rub with pumice | Exfoliate and remove wart | As needed |
Banana Peel
If you’re looking for a natural and easy way to tackle warts, banana peels might just be your new best friend. This simple remedy harnesses the power of enzymes and compounds found in the peel, which can help break down the wart tissue.
Here’s how to use it effectively:
- Cut a small piece of banana peel, ensuring it has some inner white part.
- Place the peel over the wart, white side down.
- Secure it with a bandage or tape to keep it in place.
- Leave it on overnight and repeat daily until the wart disappears.
With consistent use, you might find banana peels to be a gentle and effective solution for those pesky warts!
Castor Oil
Castor oil, a versatile and powerful natural remedy, can be an effective option for wart removal. Its high ricinoleic acid content helps to break down the wart tissue and promotes healing. To use castor oil, simply apply a small amount directly onto the wart and cover it with a bandage overnight. Repeat this daily until the wart diminishes.
| Benefits | Application Method | Frequency |
|---|---|---|
| Anti-inflammatory | Apply directly to wart | Daily |
| Moisturizing | Use a bandage to cover | Until disappearance |
| Healing | Reapply if needed | As necessary |
With consistent use, you might see results within a few weeks. Give castor oil a try, and take a step toward wart-free skin!
Lemon Juice
Another natural remedy you might consider for wart removal is lemon juice. Its acidity can help break down the wart tissue, making it easier to eliminate.
Here’s how to use it effectively:
- Squeeze Fresh Lemon: Extract the juice from a fresh lemon.
- Apply Directly: Use a cotton ball to apply the juice directly onto the wart.
- Let It Sit: Allow the juice to sit for about 30 minutes.
- Rinse Off: Afterward, rinse the area with warm water and pat it dry.
Repeat this process daily for a few weeks. You’ll likely notice a reduction in the wart’s size and appearance.
